By: Michael Eid
Before you can shape and clean, you have to get the tooth ready, find the canals, and remove the pulp. Here’s a step-by-step guide for students.
Step 1: Remove Caries & Build a Safe Access
- Excavate all decay carefully → preserve sound tooth but remove soft tissue.
- If access is from any of the walls → do a temporary build-up (I do mine in composite) to help isolation, rubber dam placement, and avoid sodium hypochlorite accident.
🦷 High-Yield Tip: Always think “containment”. Your irrigant must stay inside the chamber. Isolation is the key foundational principle in endodontics.
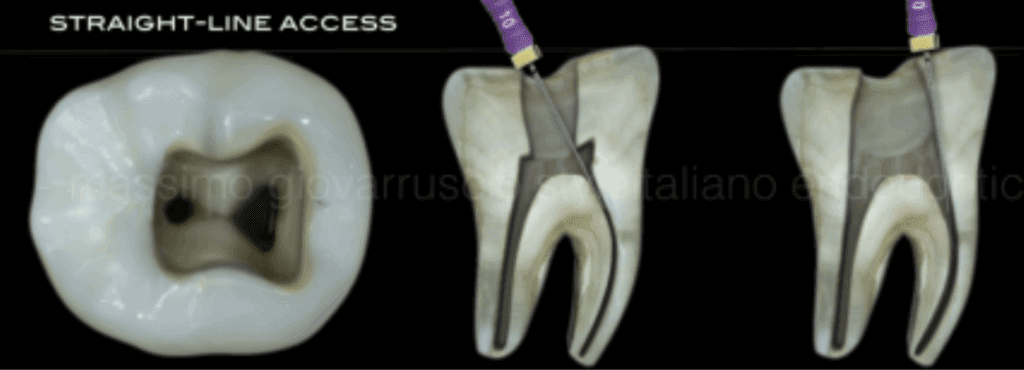
Step 2: Open the Pulp Chamber
- Use a long-shank round bur or Endo Z.
- Remove the roof of the pulp chamber completely.
- Flatten the floor. A flat floor shows grooves and canal orifices.
🦷 High-Yield Tip: Don’t go narrow; a tight access hides anatomy and makes everything harder later.
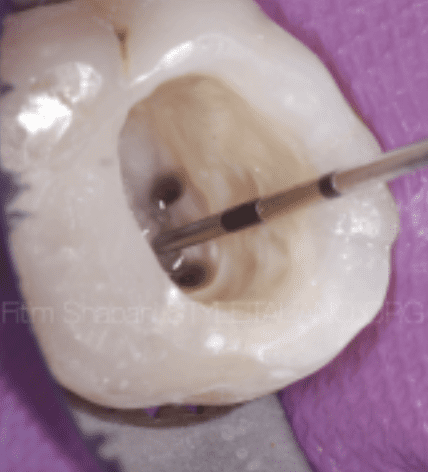
Step 3: Locate the Canals
- Identify developmental grooves → most canals lie along these lines.
- “Law of symmetry”. Canals are usually symmetrical to each other → know your anatomy. If something is in the wrong place → there might be an extra canal.
🦷 High-Yield Tip: “Doink test”. If you can stick a file and it shakes like a door hinge stopper → there’s your canal.
Step 4: Remove the Pulp
- Use small files (size 6–10) to gently extirpate pulp tissue.
- Recapitulate frequently and irrigate with NaOCl.
- Goal: remove all vital tissue so the patient is pain-free and the canal is patent.
🦷 High-Yield Tip: Recapitulation is your friend → it prevents blockages and keeps the path open for shaping.
Step 5: Confirm You’re Ready for Shaping
- Can a size 10 file glide to working length?
- If yes → you’re ready for Part 2 (shaping and cleaning).
- If no → adjust access, recapitulate, and re-irrigate.
Step 6: Close Up
- Place calcium hydroxide into the canal (use a file to scrape onto the walls) → antibacterial and promotes healing.
- Place a sponge in the canal and place a cavit over the chamber for easy access.
🦷 High-Yield Tip: I find cotton more problematic as it is easier to enter the canal, making it harder to remove at step 2.
In Conclusion
Mastering the fundamentals of endodontic access sets the stage for every successful root canal. By thoroughly removing caries, creating safe and open access, identifying canals with confidence, and ensuring all pulp tissue is cleared, you lay the foundation for predictable shaping and cleaning in the next phase. These early steps may seem simple, but they determine everything that follows. With attention to anatomy, careful isolation, and consistent technique, you’ll be prepared to move into Part 2 with efficiency, accuracy, and greater clinical
