By: Michael Eid
Class III lesions are your first step into esthetic dentistry and demand perfection. You’re now working on anterior teeth—where every margin, contour, and finish is visible.
This guide breaks it down so you can restore it with a little more confidence.
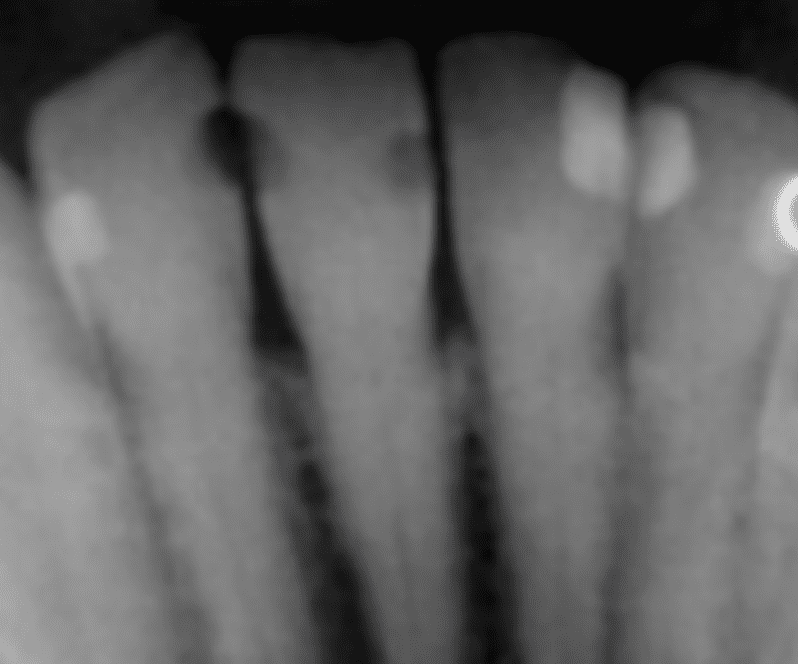
What Is a Class III Cavity?
Location: Proximal surfaces (mesial/distal) of anterior teeth, excluding the incisal edge
Class III Preparation Steps
Access
- Lingual approach is preferred to preserve facial enamel and esthetics.
- Facial approach is acceptable when the decay extends facially (if you are able to avoid breaking facial enamel, the esthetics will look far superior).
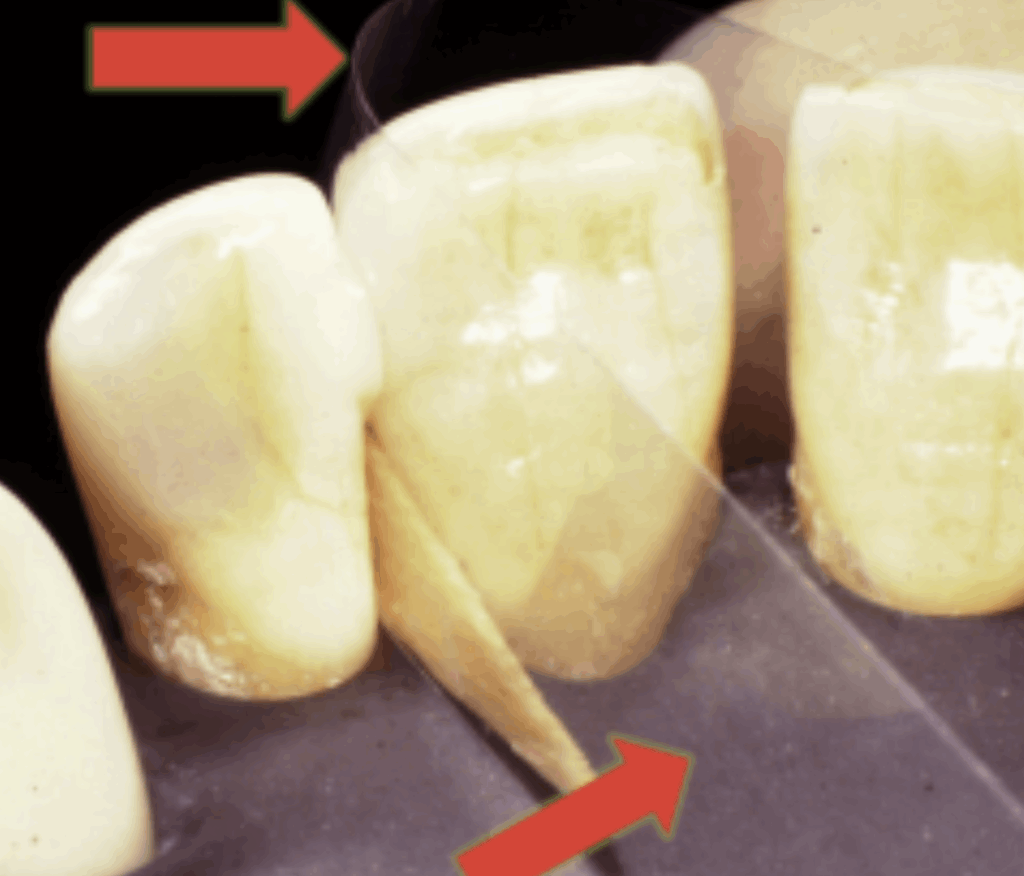
Prep Form
Ideally the outline form should look like a rectangle, 2mm axial preparation to allow proper rentiton of the composite.
Retention grooves may be needed depending on patient selection. I personally use a quarter round burr and make a “360 degree collar” so that when I put the tip of my explorer it catches on the groove. This allows the composite to withstand shear forces from occlusion.
Matrix & Wedge Tips
Matrix System:
- Mylar strips are my go to—clear, flexible, and contour naturally around the tooth leaving a smooth embrasure.
- Exploring into different matrix systems can help if there is a struggle with class 3 restorations. Pre-contoured mylar strips help follow the natural tooth contour thus leading to a better restoration.
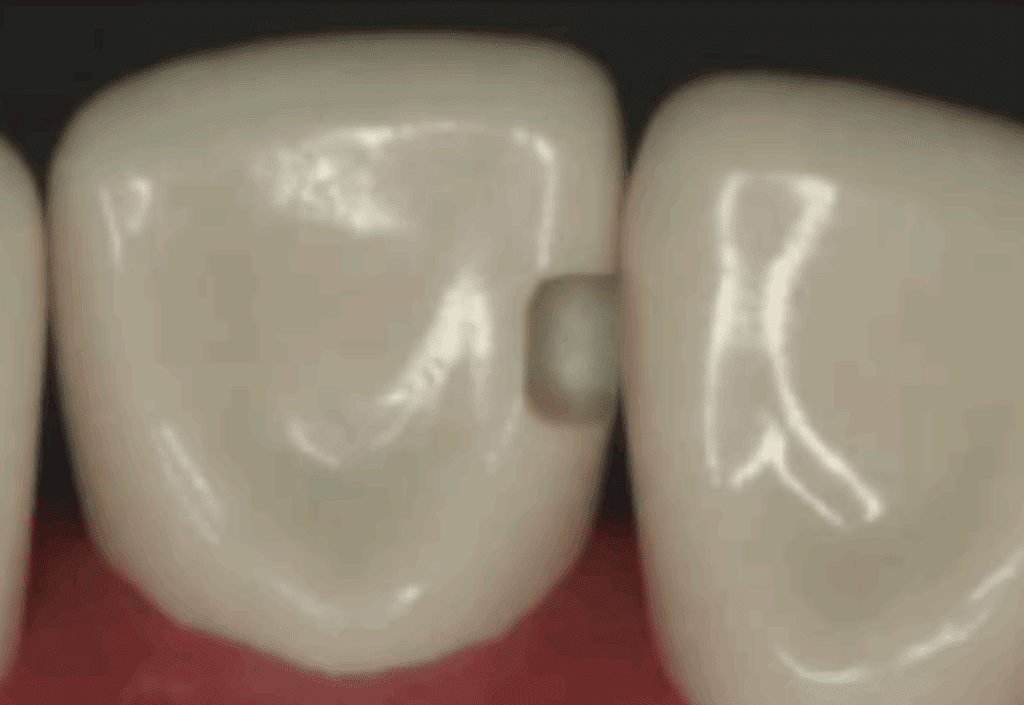
Restoration Techniques
Composite Technique:
- Place a mylar strip in between (can wedge before if contact is too tight) .
- Place a wedge large enough to separate the teeth → this allows proper contour .
- Place a small initial increment of flowable on the gingival floor, cure, then build the rest with traditional.
- Overfill the prep with composite and pull the mylar strip and put finger pressure over the access. After you cure you can remove excess. This ensures no overhangs, voids, or gaps in your restoration.
If the contact is broken during caries removal, it is important to build the proximal wall first. Then continue standard steps. Avoid finishing restoration only to realize you have an open contact!
Refining & Polishing
- A carbide football burr for the bulk, Sof-Lex discs, and polishing strips
- Use a #12 blade or scalpel to remove any flash around the margins
- Final polish with a soft rubber point, aim for a surface that feels like enamel to your explorer
Final Thought
Class III restorations may seem straightforward, but the real challenge lies in their visibility and precision. Whether you’re restoring from the lingual, facial, or both, what matters most is your control over contour, contact, and finish.
Practice shaping and polishing as much as prepping. If the patient or your faculty can’t tell where the restoration is, that’s how you know you nailed it.
Keep Reading: Class II Preparation & Restoration – Guide for Dental Students
Photo by Cedric Fauntleroy
